Pages

Tuesday 31 December 2013

Week 52 – Christmas Chocolate Cake House, Cranberry and Orange Muffins and Red Velvet Whoopie Pies

Merry Christmas y’all! I hope Santa was good to you and you had a fab festive time celebrating with your loved ones. I had an action packed baking week making Christmas goodies for my family and I had something else to celebrate... I completed my baking challenge!! Whoop Whoop, I did it!!! 52 weeks and 52 bakes (or slightly more actually, I sometimes got carried away).

With the end in sight I ramped up the baking yet again and completed five bakes (three new and two previously baked) this week, a personal best for me. Now I won’t write them all out in full on this post because we will be here for days but I will show you where to find them.

Knowing that I was going to be super busy making Christmas dinner for eight people this year, my lovely colleague Louise shared her super easy family recipe for the Christmas Chocolate Cake House. She gave me a copy of the recipe which was cut out from a magazine many years ago and has been made by someone in Louise’s family every year for the last 26 years! I knew it was going to be a reliable choice for Christmas day but I also wanted to try to make the traditional version of the Clootie Dumpling I mentioned in week 48 to finish off our Christmas feast.
    
After the excitement and gluttony of Christmas was over I had a day off with my feet up then got back in the kitchen to make a Free Cakes for Kids cake, (with the help of my friend and colleague Nuala), for a lovely 13 year old girl named Brogan. Then I couldn’t resist using my two baking related Christmas presents before the end of the challenge (cupcake cases and a cookbook stand) so I made festive Cranberry and Orange muffins and rounded off the year with some Red Velvet Whoopie Pies. Phew...it has been a bakingtastic week but I have LOVED it.

Christmas Chocolate Cake House
Creative director/architect Dave was in charge of the design features!
Carving instructions for the house!

Ingredients

Cake
·         4 level tbsp cocoa mixed with 4 tbsp of boiling water – leave to cool
·         225g Stork Margarine (at room temperature)
·         225g caster sugar
·         4 eggs
·         225g self-raising flour – sieved

Chocolate icing
·         3 level tbsp cocoa mixed with 3 tbsp of boiling water – leave to cool
·         150g butter (at room temperature)
·         350g icing sugar – sieved
·         A little milk if necessary

Decoration
·         125g marzipan (We don’t like marzipan so I used fondant roll icing instead)
·         2 packs of chocolate finger biscuits
·         Cotton wool (optional)
·         Icing sugar to dust

Method
  1. Preheat oven to 180° C. Grease and line a 7inch deep square tin.
  2. Place all the cake ingredients together in a mixing bowl and beat with a wooden spoon until well-mixed (3-4 minutes).
  3. Place the mixture in the prepared tin and bake for 50 -60 minutes.
  4. Turn out the cake and cool on a wire rack.
  5. To make the icing place all the icing ingredients in a bowl and beat until smooth, add a little milk if icing is too stiff.
  6. To shape the Christmas house – trim the top of the cake to make it level. Cut a section of the cake, measuring one third to make the roof – see photo above.
  7. Split the base and sandwich it with the icing. Spread the top and sides of the cake with icing and place the roof sections in position.
  8. Cover the outside of the house in icing. Form the roof with the chocolate fingers side by side. Roll out the marzipan (or fondant) and cut shapes for the doors, windows etc. Use some of the fondant or left over cake trimmings to make a chimney.
  9. You can use some icing to make a path, add some cotton wool to the chimney and put some Christmas trees outside if you like (we didn’t do this as you can see). Finally dust with icing sugar to look like snow (we forgot to do this, oops).
Clootie Dumpling
See photo of ingredients and instructions below. You will need a large square linen or cotton clootie (cloth) and a large pot.
Instructions on the clootie which came from my Gran!
The dumpling is HUGE!!
Dumpling toasting under the grill to finish it off.

Cranberry and Orange muffins

The good kind of muffin top!!! Thanks for the muffin cases Tori. 


Ingredients (measurements are in American cups)
·         2 cups. all-purpose flour
·         3/4 c. Sugar
·         1 tsp baking powder
·         1/2 tsp baking soda
·         1/2 tsp salt
·         1 c. Cranberries
·         1 large egg
·         1/4 tsp orange extract (I didn’t have this so just used the zest of an orange instead)
·         3/4 c. orange juice
·         1/4 c. vegetable oil

Method
  1. Preheat oven at 400° F/200° C. 
  2. In a large bowl, combine all dry ingredients together. 
  3. Stir in the cranberries. 
  4. In a small bowl or measuring cup, mix well together the egg, orange extract, orange juice and oil. 
  5. Add the orange mixture to the dry ingredients and stir just until moistened. Do NOT over stir your mixture because you will end up with tough muffins! 
  6. Spoon into muffin cups (I used my AMAZING muffin top jeans cups given to me by sister-in-law for Christmas!!!) or into greased muffin sheet. 
  7. Put in the heated oven and bake for 15 minutes, or until a toothpick inserted in the middle of your muffins comes out clean. 
Red Velvet Whoopie Pies from Cake Days, The Hummingbird Bakery Cookbook

Red ish Red Velvet

My new cookbook stand, nice huh!
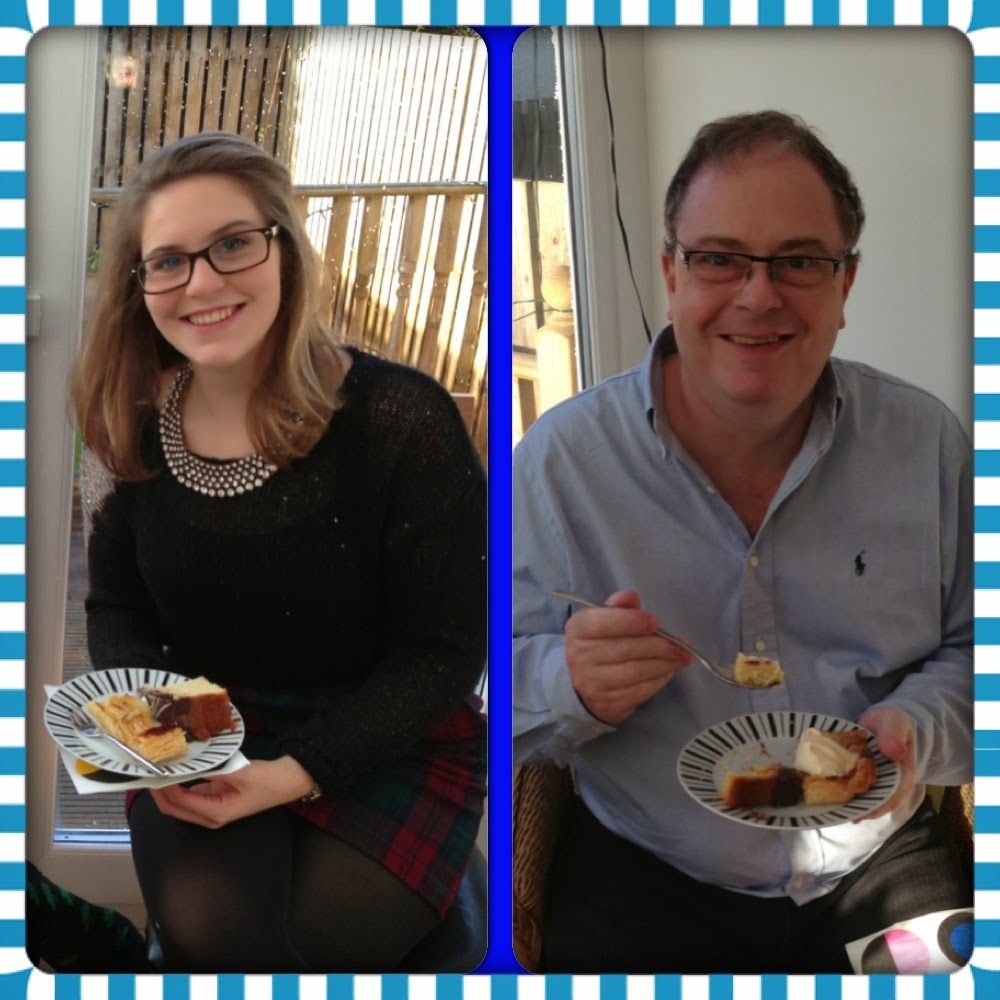
Ben with his happy cake face.

Ingredients – for the pies
  • 120g unsalted butter – softened
  • 200g soft dark brown sugar
  • 1 large egg (this definitely needs to be a large one because the batter gets very stiff)
  • 120ml buttermilk
  • 1 tsp vanilla essence
  • 340g plain flour
  • 2 tbsp cocoa powder
  • ½ tsp bicarbonate of soda
  • ¼ tsp salt
  • 30ml red food colouring (I probably used far more than this to actually make it go red because it took ages to change colour!)
Ingredients – for the filling
  • 85g unsalted butter, softened
  • 150g icing sugar
  • 80g full fat cream cheese (I used light because it’s all we had, but I’m sure it would be better with full fat!)
  • 100g vanilla marshallow fluff (this was another special delivery from my mum from America, but I have now since seen it in small quantities in Sainsbury’s)
Method
  1. Preheat the oven to 170° C and line two baking trays with baking parchment (do not turn the oven on now as instructed because you have to chill the batter in the fridge for 30 minutes later on in the recipe)
  2. Using a handheld electric whisk cream the butter and sugar together until lights and fluffy. Add the egg and mix in thoroughly, scraping down the sides of the bowl.
  3. In a jug, mix together the buttercream and vanilla by hand, then add it to the creamed mixture, mixing on a low speed. Sift in the flour, cocoa powder, bicarb and salt in two batches, mixing thoroughly after each addition until all the ingredients have come together. Add the red food colouring then increase the speed to medium-high and mix well to ensure the batter is an even red colour (you need gallons of red food colouring to make this go red!). Leave the batter in the fridge for 30 minutes to cool and set.
  4. Spoon the batter onto the prepared trays, making 8-10 mounds per tray, each 3-5 cms in diameter and 2-3 cms apart. Bake in the oven for 10-13 minutes or until springy then allow to cool completely before you assemble the pies.
  5. While the sponges are cooking make the filling. Using a handheld electric whisk mix together the butter and icing sugar on a low speed until combined. Add the cream cheese and mix, still on a low speed. Once all the ingredients are mixed, increase the speed to high and beat for approx 1 minute.
  6. Add the marshmallow fluff and beat the filling until light and fluffy. Place the filling in the fridge for about 30 minutes to firm up.
  7. When the cakes have cooled, spread about one tablespoon of filling on the flatside of one sponge and then stick another sponge flat-side down on top to make a sandwich. Repeat with the remaining sponges and filling.
So, most importantly how did they taste... here is a whirlwind rundown

Chocolate Cake House Cake – yummy basic chocolate cake which is SUPER fun to decorate, it’s really the equivalent of a gingerbread house in cake form. You could go wild with the decorations if you had the time and creative flair. I think this could be a great (if perhaps slightly messy) activity to do with kids.

Clootie Dumpling – yum yum yum! Far better than Christmas pudding in my opinion so I think it will be on our table again in years to come. It is just a nice lighter, spicy, fruity alternative at the end of heavy Christmas meal.

Cranberry and orange muffins – no soggy bottom but plenty of muffin tops here. These are really fresh, almost healthy tasting muffins which are great for breakfast or morning snack.

Drum roll please...the final bake of the 52 week challenge... Red Velvet Whoopie Pies... well I am a little bit underwhelmed really. They were a bit of a faff to make and seem confused about whether they are cakes or biscuits which just means they are quite heavy. I made eight big ones which might not have been the best idea, maybe I should have tried more smaller ones? Oh well you can’t win them all, just goes to show that 52 weeks of baking doesn’t mean you will LOVE everything but I enjoyed giving them a go. Anyway, they still got a thumbs-up and a high five from taste tester Ben so that’s a win.

You are probably in need of a strong drink after reading that marathon post so there is nothing left for me to say other than thank you for reading, I hope you have enjoyed the bakes and maybe tried a few out for yourself. I have LOVE the challenge and it feels great to have properly learnt a new skill over the past year. I will definitely keep baking, I think I am slightly addicted but at least it’s legal!


The challenge has been so much fun that I have set myself another one for next year... I will reveal all in a post tomorrow. 

xx Linds xx

P.S Here is a photo of the Free Cakes for Kids cake for Brogan
Nuala, my assistant with the finished cake. 

Monday 23 December 2013

Week 51 - Apple Tart and Tunis Cake

The penultimate week of the baking challenge has been an action packed quadruple bake week, two were the main event and two were cheeky add-ons. On Wednesday I made a classic Victoria sponge for one of my colleagues’ birthdays which warmed me up nicely to do two bakes on Saturday for my husband and brother-in-law’s birthdays (they are identical twins!). With their birthdays being so close to Christmas they coined the term Birthmas many years ago which usually involves a fun filled long weekend of birthday and Christmas celebrations all in one and this year was one of the best yet. We had Dave’s parents, bother, sister and sister-in-law visiting us in bonnie Scotland for the weekend and to get everyone ready for a packed day of birthday fun we started the celebrations with an Apple Tart, a Tunis Cake and a bottle of fizz.

Seeing as Dave has been such a great support during the baking challenge by editing my blog, giving me helpful feedback on my bakes and eating VAST quantities of cake every week for the last 50 weeks (it’s a hard life) I thought it was only fair he got to choose his own birthday bake. Slightly randomly he chose an apple tart, not your traditional birthday cake but it actually turned out to be a great choice. I wanted to make something more cake-like to give Dave’s brother Nick a treat as well.  Mary Berry came up with the answer yet again, this time during this week’s Great British Bake Off Christmas Special. One of Mary’s recipes was for a Tunis Cake which is apparently a traditional Christmas time bake (no one I have mentioned this to has ever heard of it, mind you) so I thought this might make a good birthmas compromise.

Apple tart

Ingredients
  • 375g pack puff pastry, preferably all-butter
  • 5 large eating apples - Cox's, russets or Elstar
  • juice of 1 lemon
  • 25g butter, cut into small pieces
  • 3 tsp vanilla sugar or 1 tsp vanilla extract
  • 1 tbsp caster sugar
  • 3 rounded tbsp apricot conserve
Method
  1. Heat oven to 220C/fan 200C/gas 7. Roll out the pastry and trim to a round about 35cm across (I just rolled out the pastry in a rectangle shape because it was just easier to fit it onto the baking sheet). Transfer to a baking sheet lined with parchment paper.
  2. Peel, core and thinly slice the apples and toss in the lemon juice. Spread over the pastry to within 2cm of the edges. Curl up the edges slightly to stop the juices running off.
  3. Dot the top with the butter and sprinkle with vanilla and caster sugar. Bake for 15-20 mins until the apples are tender and the pastry crisp. I put the baking tray on top of another tray which had been heating in the oven.  A colleague years ago told me you should always do that when cooking with puff pastry to help it cook underneath and avoid the dreaded soggy bottom.
  4. Warm the conserve and brush over the apples and pastry edge. Serve hot with vanilla ice cream or crème fraîche. I served it with either double cream or ice cream and it was delicious!
            
                 Before....
After...

Tunis cake

Ingredients
Cake
Topping
  • 300ml/10fl oz double cream
  • 400g/14oz plain chocolate, broken into small pieces
  • 200g/7oz natural marzipan (I don’t like marzipan so just used fondant icing for the birthmas decorations... see the photos below)
  • gel food colouring, in red and green (these weren’t required for our artistic vision!)

Method
  1. Preheat the oven to 180C/350F/Gas 4 (fan 160C). Grease and line a 20cm/8in deep cake tin with baking parchment (the baking paper needs to come up high above the top of the tin to create a collar for the topping to set in -  see the photo below).
  2. Add the butter, sugar, flour, ground almonds, eggs and lemon zest to the bowl of a freestanding electric mixer (alternatively use a sturdy bowl and a hand-held mixer). Beat on high speed for a minute. Spoon the batter into the prepared cake tin and level the surface with a palette knife or spatula (the batter was quite stiff so I added a few drops of milk to try to loosen it up).
  3. Bake for 45 minutes, then cover with foil to prevent the top from browning and cook for a further 15 minutes (I couldn’t imagine how it could take this long to bake but it did... don’t doubt Mary B), or until a skewer inserted into the centre comes out clean. Leave to cool completely in the tin on a wire rack.
  4. For the topping, pour the cream into a small pan and bring almost to the boil. Remove from the heat, add the chocolate and stir until melted. When cool but not setting, pour the chocolate mixture in an even coat over the cooled cake (that is still in the tin) and put aside to set.
  5. To decorate, colour 175g/6oz of the marzipan with green food colouring to turn it the colour of holly leaves. Using a holly leaf shaped cutter, cut out 20 holly leaves. Mark the veins with a knife, lay over a rolling pin and leave to dry (this curls the leaves slightly). Colour the remaining marzipan with the red food colouring and roll into 30 ‘holly berry’ size balls. Leave to dry. I had Dave and my sister-in-law Tori (of last week’s bake) as artistic directors of the decorations and they well and truly went off-piste with this one. As Nick has two cats and LOVES them loads they decided that there was nothing he would love more for his birthday than a cat cake!!!
  6. To serve, remove the cake from the tin and carefully peel off the parchment paper so that you get a clean line between the cake and the chocolate layer. Arrange the holly leaves and berries in a wreath around the edge of the cake. 


Birthmas was a triumph and the birthday boys really enjoyed their cakes/bakes and a fun filled day.

I was a bit reluctant to make the apple tart at first because it involved puff pastry and I knew that would take a lot of skill and time to make so I would have to buy it ready made. This kind of went against the grain because in the previous 50 weeks of the challenge I have tried to make as much as possible from scratch. But in the end I listened to many great bakers - professional and amateur alike - who quite rightly said that life is far too short to make puff pastry, you should just buy it!!

As for the Tunis Cake I wouldn’t have thought that the combination of lemon and chocolate flavours would work but it was surprisingly fresh and would be a great alternative to a Christmas cake if you want something lighter than the usual dried fruit fest. The cake itself was a bit dense and went dry the next day but the chocolate topping makes up for that and it was served with double cream which always helps!!

The week was rounded off with a fourth bake for our Birthmas Christmas dinner on Sunday. With a LOT of help from sous-chefs Dave and Tori we (I mean they really) whipped up a panetone bread and butter pudding which was delicious. I would strongly recommend you use panetone for all bread and butter pudding desires in future, it is fabulous.  This blog post was already far too long to put the recipe in as well but you can find it here http://www.bbcgoodfood.com/recipes/1358/panettone-pudding. We just ignored the bit about the water bath set up, far too complicated on a day full of Christmas cooking.

Birthday boys Dave and Nick with their cakes

Erin (sister-in-law) and Jo (mother-in-law)

Tori (sister-in-law) and Phil (father-in-law)
Happy baking everyone, see you next week for the final instalment (sniff sniff) of the baking challenge,


X Linds x

Tuesday 17 December 2013

Week 50 - Chocolate Olive Oil Cake

The past week, and weekend were decidedly hectic with my office Christmas party on Friday and a wedding at the other end of the country on Saturday lunchtime which was really lovely but involved some VERY early travels. So I knew I was going to have to bake mid-week or squeeze in a cheeky bake in Kent while we were staying with my parents-in-law for the wedding. I decided to go for the latter as my sister-in-law, Tori, was going to be at her parents as well and she too is a bit of a baker. I don't have any sister of my own so when I got married it was a lovely bonus to gain one! Us being together this weekend gave us the chance to have some sisterly bonding over one of our fave activities.  
With the countdown to the end of the baking challenge well and truly upon me the selection of bakes is becoming somewhat tricky because I have made so many of my fave tasty treats! There was also a bit of pressure on this bake because it had to feed 12 of us as the finale to a delicious Sunday roast made by my parents-in-law Jo and Phil
Tori and I opted for a Nigella chocolate olive oil cake to feed the masses. Now I will admit that I have never been a huge fan of hers (I can't stand the cooking/flirting combo she goes for on TV) but I must admit she does know how to make a good bake!

Ingredients 

  • 150 ml regular olive oil (plus more for greasing)
  • 50 grams good-quality cocoa powder (sifted)
  • 125 ml boiling water
  • 2 teaspoons best vanilla extract
  • 150 grams ground almonds (or 125g plain flour / 3/4 cup plus 1 tablespoon all-purpose flour). We used flour because we didn’t have any wheat-free guests but we thought it might be good to try the ground almonds because I think the cake might be a bit more squidgy in the middle which would be yummy.
  • ½ teaspoon bicarbonate of soda
  • 1 pinch of salt
  • 200 grams caster sugar
  • 3 large eggs


Method 

  1. Preheat your oven to 170°C/gas mark 3/325ºF. Grease a 22 or 23 cm/ 9inch springform tin with a little oil and line the base with baking parchment.
  2. Measure and sift the cocoa powder into a bowl or jug and whisk in the boiling water until you have a smooth, chocolatey, still runny (but only just) paste. Whisk in the vanilla extract, then set aside to cool a little.
  3. In another smallish bowl, combine the ground almonds (or flour) with the bicarbonate of soda and pinch of salt.
  4. Put the sugar, olive oil and eggs into the bowl of a freestanding mixer with the paddle attachment (or other bowl and whisk arrangement of your choice) and beat together vigorously for about 3 minutes until you have a pale-primrose, aerated and thickened cream.
  5. Turn the speed down a little and pour in the cocoa mixture, beating as you go, and when all is scraped in you can slowly tip in the ground almond (or flour) mixture.
  6. Scrape down, and stir a little with a spatula, then pour this dark, liquid batter into the prepared tin. Bake for 40-45 minutes or until the sides are set and the very centre, on top, still looks slightly damp. A cake tester should come up mainly clean but with a few sticky chocolate crumbs clinging to it. I think the oven might have been slightly too hot because the top looked like it cooked a bit too quickly so we didn’t quite get the squidgy, sticky centre. But this might be because of the flour. Oh well we will just have to make it again to give it a try!
  7. Let it cool for 10 minutes on a wire rack, still in its tin, and then ease the sides of the cake with a small metal spatula and spring it out of the tin. Leave to cool completely or eat while still warm with some ice cream, as a pudding. We served it with clotted cream ice cream and raspberries which were lovely.


Baking in our p-j's.....LOVE IT!

A few cheery snowmen to add a touch of Christmas

Tori and I with the finished article!


Well if the clean plates were anything to go by the cake went down well. This is a great recipe to use if you have friends or family with food allergies /intolerances because it can be both wheat and dairy free without tasting like it!! And I'm sure it's actually good for you because it has loads of olive oil in it and hardly any nasty stuff so it's practically one of your five a day?! Most importantly the extended family seemed to enjoy it and it was a lovely end to a deliciously, overindulgent lunch. 


Dale is enjoying it

Erin with her happy cake face!

Empty plates all round


50 down, 2 to go....


Happy baking xx Linds xx

Tuesday 10 December 2013

Week 49 – Yule Log

This week I made a festivetastic Yule bake which was the final part of the Thank St Andrews Its Christmas Day trilogy. We were invited to our good friends Paul and Fiona’s for a Christmas jumper party this past weekend and months ago they asked if I could bring a bake to add to the buffet. As many of the guests are blog readers and previous eaters of my bakes the pressure was on to impress!

Every year since I can remember we have had a Marks and Spenser’s Yule log in my family home over Christmas so I thought it was about time I tried to make my fave festive treat. In order to make something to wow our friends I chose a Mary Berry classic recipe from the BBC website.


Ingredients

For the chocolate sponge
  • 4 large free-range eggs (definitely make sure you use large eggs, I never thought this made any difference but as this sponge recipe has no fat or other liquid you really need all the egg you can get!)
  • 100g/3½oz caster sugar
  • 65g/2½oz self-raising flour
  • 40g/1½oz cocoa powder
For the chocolate ganache topping
  • 300ml/½ pint double cream
  • 300g/10½oz dark chocolate (around 35-40% cocoa solids), broken into small pieces (I did my usual and mixed half milk chocolate and half dark chocolate)
For the cream filling
To decorate
  • icing sugar, for dusting
  • a toy robin or sprig of holly (I couldn’t find an obliging robin so I found a little Merry Christmas tree decoration to decorate the log)

Method

  1. Preheat the oven to 200C/400F/Gas 6. Lightly grease a 33x23cm/13x9in Swiss roll tin, and line with non-stick paper or baking parchment, pushing it into the corners.
  2. For the sponge, in a large bowl whisk the eggs and sugar using an electric hand whisk until the mixture is pale in colour, light and frothy. Sift the flour and cocoa powder into the bowl and carefully cut and fold together, using a spatula, until all the cocoa and flour are incorporated into the egg mixture, be careful not to beat any of the air out of the mixture. (This took quite a while to mix in all the flour and cocoa and I wasn’t sure it was going to work but if you persevere it comes together after a few minutes of gently folding it in).
  3. Pour the mixture into the lined tin and spread evenly out into the corners. Bake in the middle of the preheated oven for 8–10 minutes, or until well risen and firm to the touch (it really is quite a firm sponge because it is so thin) and the sides are shrinking away from the edge of the tin.
  4. Place a piece of baking parchment bigger than the Swiss roll tin on the work surface. Dust with icing sugar generously. Carefully invert the cake onto the paper and remove the bottom lining piece of paper.
  5. Cut a score mark 2.5cm/1in in along one of the longer edges. Starting with this edge, begin to tightly roll up the sponge using the paper. Roll with the paper inside and sit the roll on top of its outside edge to cool completely (make sure you roll the sponge as soon as you get it out of the tin...read more about this later!)
  6. While the cake is cooling, make the ganache topping. Heat the cream in a pan, just so as you can keep your finger in it. Remove from the heat and add the chocolate, stirring until it is melted. Cool to room temperature, then put into the fridge to firm up (this icing needs to be very thick for piping).
  7. Uncurl the cold Swiss roll and remove the paper. Spread the whipped cream on top, and re-roll tightly. Cut a quarter of the cake off from the end on the diagonal. Transfer the large piece of cake to a serving plate and angle the cut end in to the middle of the large cake to make a branch.
  8. Put the chocolate icing into a piping bag fitted with a star nozzle. Pipe long thick lines along the cake, covering the cake completely so it looks like the bark of a tree. Cover each end with icing or, if you wish to see the cream, leave un-iced. Alternatively, just use a palette knife to spread on the icing and create rough bark texture with a fork. The ganache is runny enough to just spread on with a palette knife which I find much less fiddly than using a piping bag.
  9. Dust with icing sugar and garnish with fresh holly or a little robin to serve.

Well readers I admit that I had to make this recipe twice...because the first one was a DISASTER (said in Craig Revel Horwood’s famous Strictly Come Dancing voice!!). The first sponge batter felt a bit stiff when it was in the bowl and when it came to rolling it up it just broke up into 4 or 5 large pieces. I think it happened for a couple of reasons, firstly I used medium eggs and they really do need to be large, I think my scales were a little bit off so I put in a bit too much flour and I also left the sponge to cool for a few minutes before I tried to roll it up which really didn't help. 

All in all it was probably one of the biggest disasters I have had in the baking challenge to date which is saying something after 49 weeks. I will admit I did start to panic slightly, I felt like Mary B had let me down, we were due to leave for the party in just over 2 hours and I didn’t have enough ingredients to start again. Eeeekkkk!! Anyway, after a flying visit to the supermarket I was back in business and the second try turned out wonderfully rich, tasty and horribly calorific. I rolled the sponge and left it to cool while we popped out for our Christmas tree, creamed and iced it ready to dash off to the party where it went down a storm. Everyone, including Paul and Fiona’s one year old son Harrison and their sausage dog Sizzle loved it.

Claire, Fi, Sizzle, Lotte and Lotte's incredible light-up jumper

Harrison and James

Paul looks a bit angry at his Yule Log and the other Paul forgot to wear a Christmas jumper, but at least doesn't seem annoyed at the Log!!

I can’t say that that the sponge was much of a spiral inside, it was more cream and dripping chocolate ganache but people wolfed it down regardless. Other than that the second attempt came together well and after it was polished off we all proceeded to have a jolly afternoon of catching up in our Christmas jumpers.

I was really pleased that everyone liked the log but I was also glad that I made it a second time to prove that my hero Marry Berry hadn’t actually let me down after all. Phew! The Yule Log finishes off the TSAIC trilogy and was a delicious way to end to this extended celebration of my favourite holiday of the year.


The log before it was devoured!


Happy festive baking, 

Linds xx 

Monday 2 December 2013

Week 48 – Clootie Dumpling

Part two of the Thank St Andrews It’s Christmas Day trilogy is a thoroughly Scottish bake. I had a few days off work this week so went down to visit my parents in Yorkshire and had a chance to bake with my mum again which was great. I started my usual tactic of searching online for something to bake when my mum suggested I could just look in some of her cookbooks, old-school huh! Well I am very glad I did because I found something really special.

My mum gave me her copy of the Glasgow Cookery Book to look through for inspiration. My mum was given the book in her home town of Glasgow and it has been well used and well loved for a long time. I won’t say the exact year she received it because I don’t want to reveal her age (she doesn’t look a day over 21!) but the book has her maiden name in it so she’s definitely had it for a year or two!  Whilst flicking through the book I came across a pile of loose recipes, two of which really caught my eye. The recipes were for the Scottish classic the Clootie Dumpling A traditional dessert pudding,  clootie dumpling is made with flour, breadcrumbs, dried fruit (sultanas and currants), suet, sugar and spice with some milk to bind it, and sometimes golden syrup. Ingredients are mixed well into a dough, then wrapped up in a floured cloth, placed in a large pan of boiling water and simmered for a couple of hours before being lifted out and dried before the fire or in an oven. Recipes vary from region to region e.g. in North Fife and Dundee it is not common to use breadcrumbs but the use of treacle is common (Thank you Wikipedia).

The first recipe I found was for a traditional steamed Clootie which was written out by hand by my mum, some years ago judging by the yellowness of the paper.  The second recipe was a more modern microwave Clootie recipe which had been written out by my Gran (my mum’s mum) along with a note about it. We think that my Gran had posted my mum the recipe around the time of mum’s birthday, because she always used to get a Clootie Dumpling instead of a birthday cake. The note read as follows:

“Was going to make you a dumpling but it was too heavy to send, so here’s the recipe. I have tried it a couple of times and it’s quite delicious really. The only snag is the fruit seems to go to the bottom, but it doesn’t spoil the taste”.


The cookbook and recipes

My mum and dad moved away from Glasgow over thirty years ago so the note could have been sent anytime after they moved and were too far away for Gran to deliver or post mum’s traditional birthday treat!!

So, what could be better for a Scottish baking week than a Scottish recipe, written and recommended by my Scottish Gran, found in the back of a Glasgow cookbook!! It is also gave me the chance to do something I haven’t done before in the baking challenge which is to bake using a microwave.

Ingredients (they were all written in imperial measures so I did some rough conversions to metric)

1 cup of water
1 cup of sugar
1/2lb (226grams) of margarine
3/4lb (340grams) sultanas and raisins
1 tablespoon of treacle
1 tablespoon of mixed spice
1/2lb (226grams) of plain flour
2 eggs
1 tsp Bicarbonate of Soda

Method
1)      Melt water, sugar, margarine, fruit, treacle and mixed spice in a pan for 2 minutes. Add the four, egg and bicarbonate and combine together.
2)      Line a bowl or dish with Clingfilm
3)      Pour mixture into the lined bowl and cook in the microwave on high for 9 minutes (I cooked mine for an extra few minutes, probably about 13-14 in total because the bottom looked raw and runny. Baking in a microwave is tricky because food keeps on cooking after you stop heating it, so it’s hard to judge when it’s done. My dad told me that he thought, in his expert baking opinion, that the Clootie was a bit overcooked, I should have trusted Gran’s timings!)

The fruity mixture coming together

The dumpling in all its glory

I would have to say I agree with my Gran, it really was quite delicious. Being cooked in the microwave instead of the traditional steaming in a floured Clootie (Scottish word for cloth) made the dumpling a bit lighter and spongier than is traditional. My Gran was also correct, the fruit all sunk to the bottom of the dumpling but my official taste testers, my mum and dad, assured me that it was just as tasty (if a little drier) as a traditional one.

My dad considering his first mouthful!! What will the official taste tester think??

Sadly my Gran passed away earlier this year so I won’t have the chance to ask her about her recipe or tell her I have tried it out, but I think she was watching from somewhere and I hope she approved of me using her recipe!

I hope you all had a lovely Thanksgiving, St Andrews Day and TSAICD this week. Now it’s time to channel the Christmas spirit and plan a Christmassy bake for the third part of the trilogy next week.

Happy baking, xx Linds xx